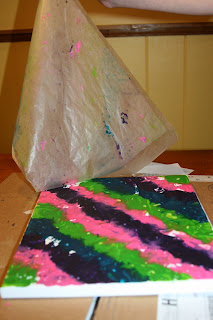
2. Grate each crayon. (Jadyn and I talked about it and decided that when we do this again we'll try a pencil sharpener instead of a grater) Some bigger chunks of crayon are ok.
3. Figure out what design you'd like to do. (We did this before anything else) Jadyn decided to go with diagonal lines. Next time we're thinking about trying a sun.
4. Once you have the crayon shavings arranged the way you want cover the entire canvas with wax paper **wax side down.**
6. You're project is complete.....well maybe.
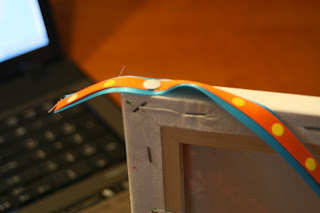
7. We picked up a solid 5/8" satin ribbon and a polka dot 3/8" grosgrain ribbon and white thumbtacks to pretty up the border. Jadyn overlapped the ribbon and we used the polka dots as the guide to determine where the thumbstacks should go to secure the ribbon. Just pick any color ribbons and thumbtacks that match your project.
8. Finish the ends of the ribbon off by folding over the end section of the ribbon and placing it over the starting end. Use a thumbtack to secure it into place.
Here is what the finished edges will look like (On our way to drop off the project at the fair)
Do you see the Blue Ribbon???????
Now we need to come up with new ideas for next year!
- Stretched Wrapped Canvas
- Crayons
- Cheese Grater or Pencil Sharpener
- Wax Paper
- Iron
- Optional: Ribbon & Thumbtacks
If you have any questions just let me know.


